When you see the word username, that should be your actual email address.
For example, if your address is johndoe@whidbey.net, your username would be johndoe@whidbey.net; if your address is johndoe@whidbey.com, your username would be johndoe@whidbey.com; if your address is johndoe@pointroberts.net, your username would be johndoe@pointroberts.net, etc.
These setting should be the same for all versions of Thunderbird from 3.6 to 9. If your screens do not look like those depicted, please contact us at (360) 321-TECH or email support@whidbey.net.
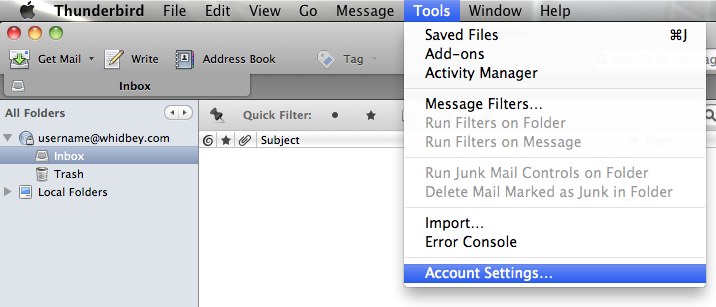
1. Click the Tools menu and select Account Settings…
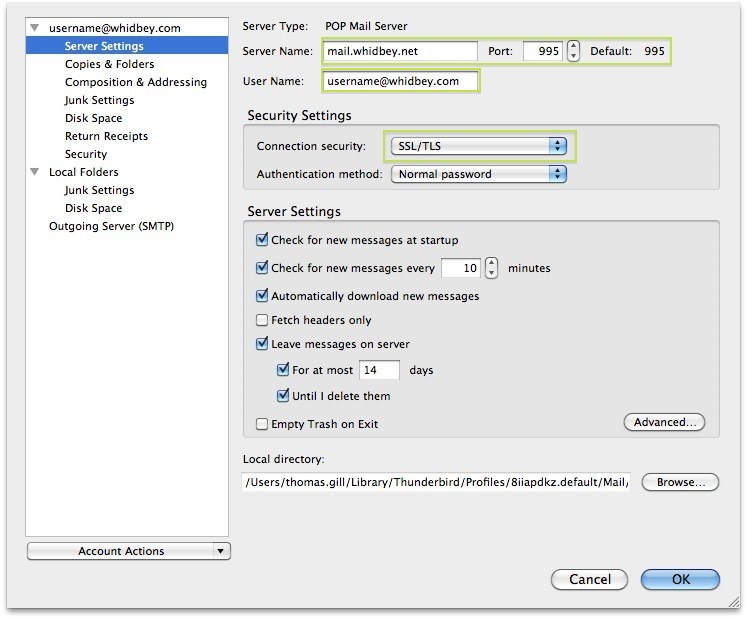
2. Click the Server Settings category.
3. If Server Name contains mail.whidbey.com, change it to mail.whidbey.net.
If it doesn’t contain “whidbey” at all, this is not a Whidbey Telecom account.
4. Ensure your entire email address is entered into the User Name field.
5. From the “Connection Security” drop-down, Select “SSL/TLS“. Make sure the port changes to 995 (POP) or 993 (IMAP).
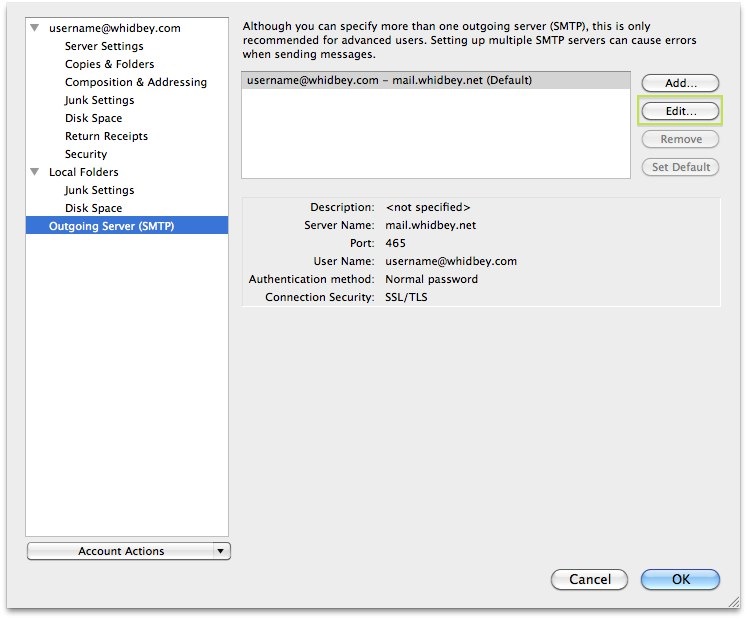
6. Click the Outgoing Server (SMTP) category.
7. Click the Edit button.
8. If Server Name contains mail.whidbey.com, change it to mail.whidbey.net.
9. From the “Connection security“, Select “SSL/TLS“
10. From the “Authentication Method” drop-down, Select “Normal Password“.
11. Ensure your email address is in the “User Name” field.
12. Ensure the “Port” says 465.
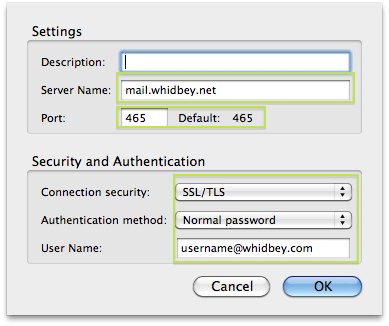
13. Click OK at the bottom, and OK in the Account Settings window.
NOTE: Please remember to perform this change on any other computers you use.


